When to use Mimesys
When quoting a patient for a lens where a Gaze ID is required, an error will appear. The Gaze ID is acquired after performing a screening on the patient with the Pico Neo 3 using the Mimesys application.

Head Office recommends The VR screening should take place on every customer aged 40+ or at the optometrist’s discretion.
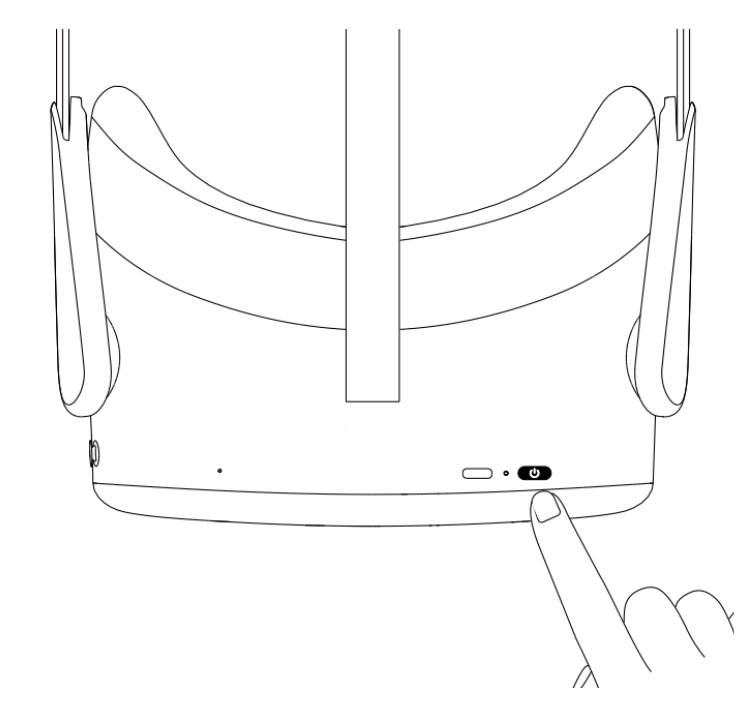
Powering On the Headset
Power on the Pico Neo 3 by pressing and holding the Power Button down for 2 seconds until the status indicator light turns blue.
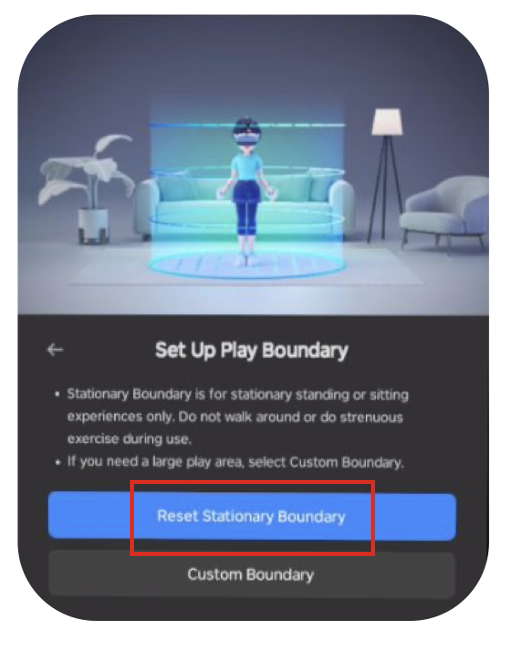
Setting Up the Play Boundary
First, you will need to put on the Pico Neo 3 to setup a stationary play boundary using the right controller of the Pico Neo 3. You can follow the video or continue reading the instructions below.
Select "Reset Stationary Boundary" on the popup
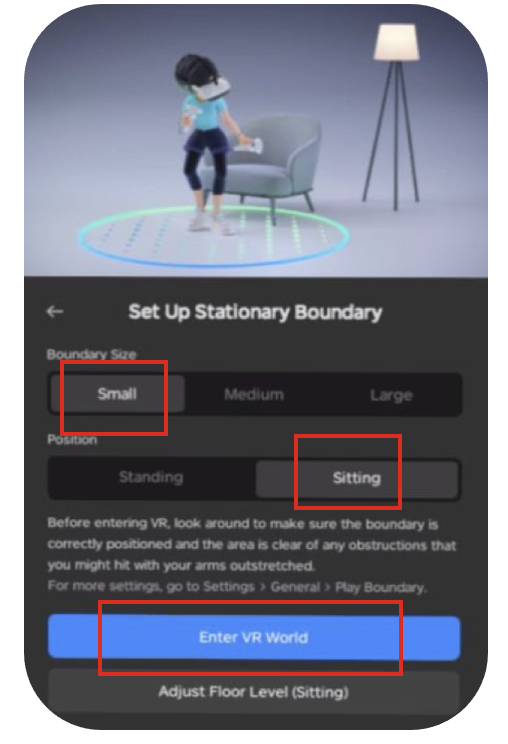
Then, while sitting on the chair the patient will be seated on for the screening, set the boundary size to “Small” and the position to “Sitting”. Then click on “Enter VR World”. Once completed it will take you to the main menu.
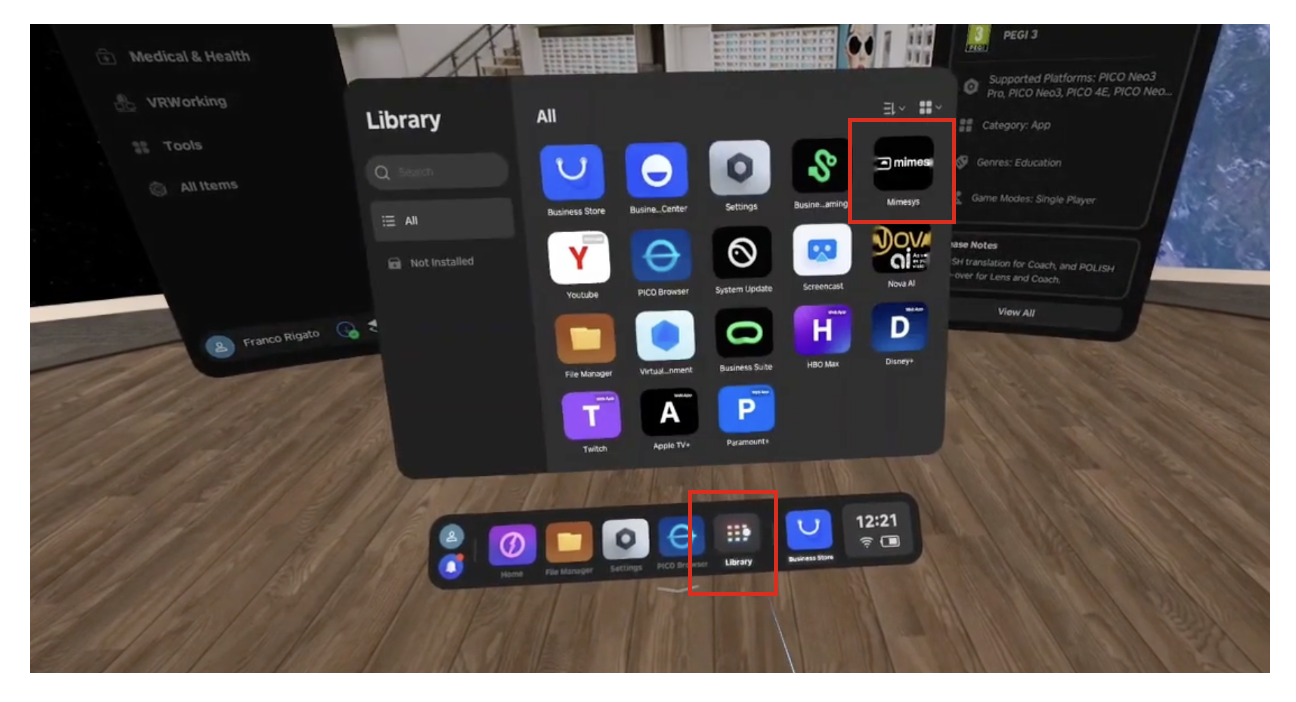
Open Mimesys
Open the library, then open the “Mimesys” app.
Once the app has opened and you are inside the optic store, take off the headset and instruct the patient to sit on the chair.
On the computer open the Mimesys VR Hub (or go to: https://mimesys.reynekeandmuller.co.za) and click on the blue "Cast" button.
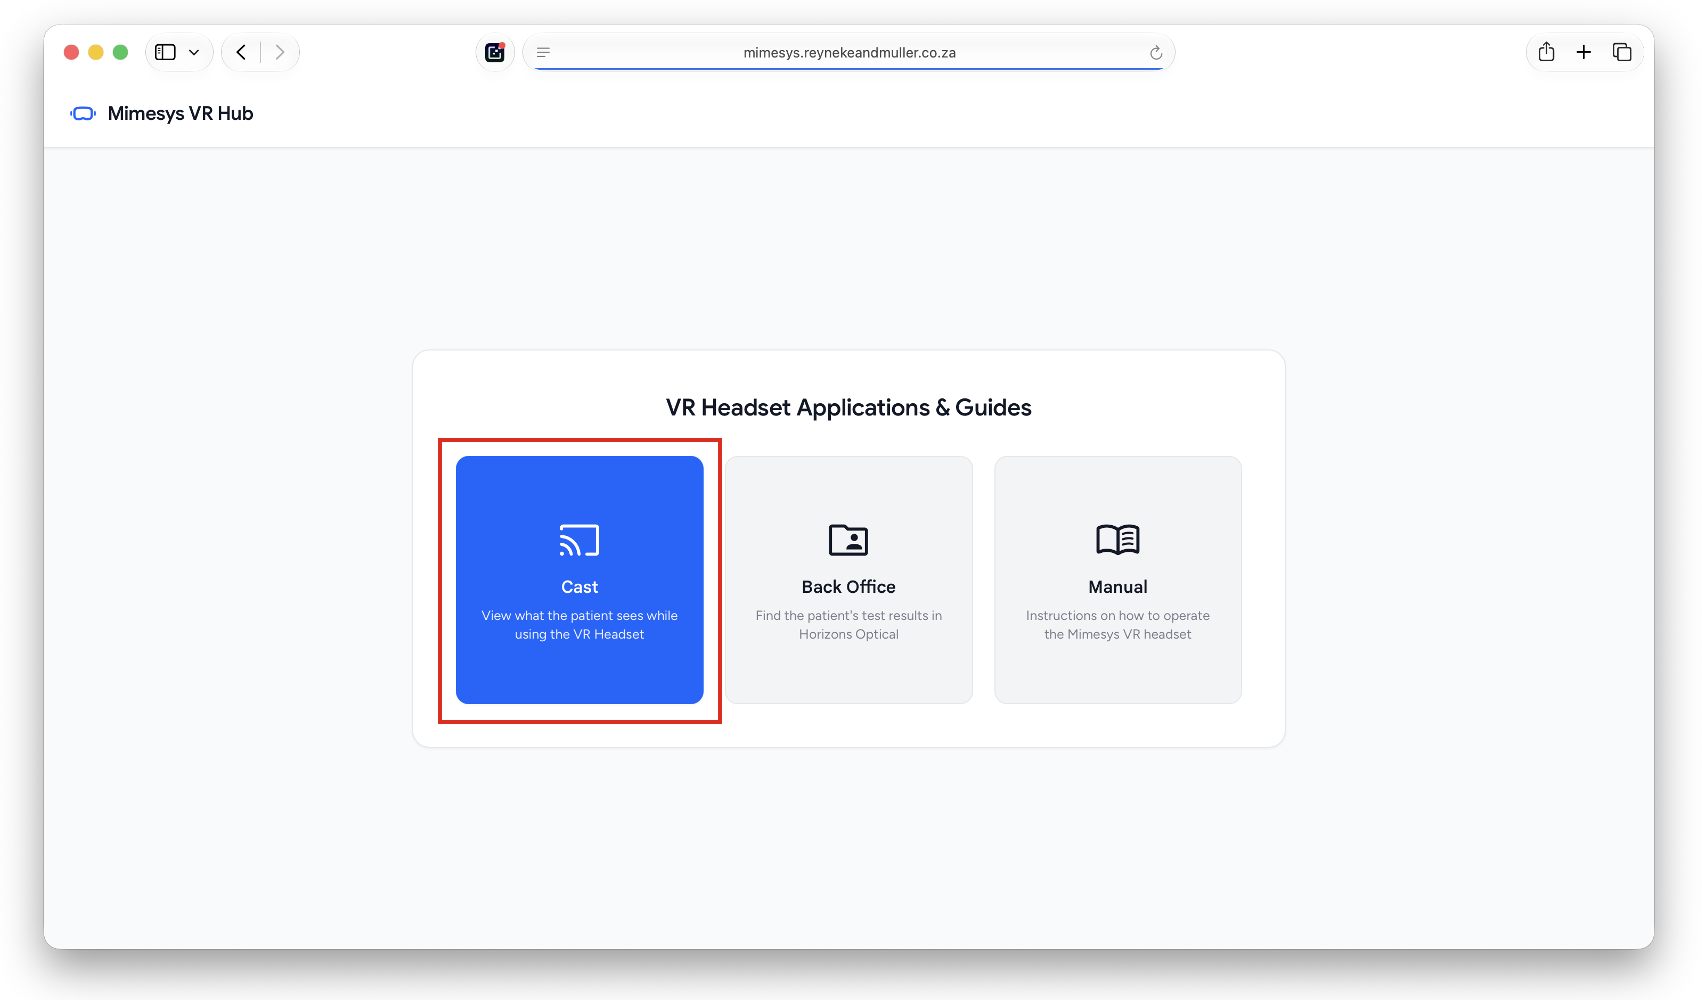
Once the cast website has loaded, you will see a page with a button to "Start Screencast."
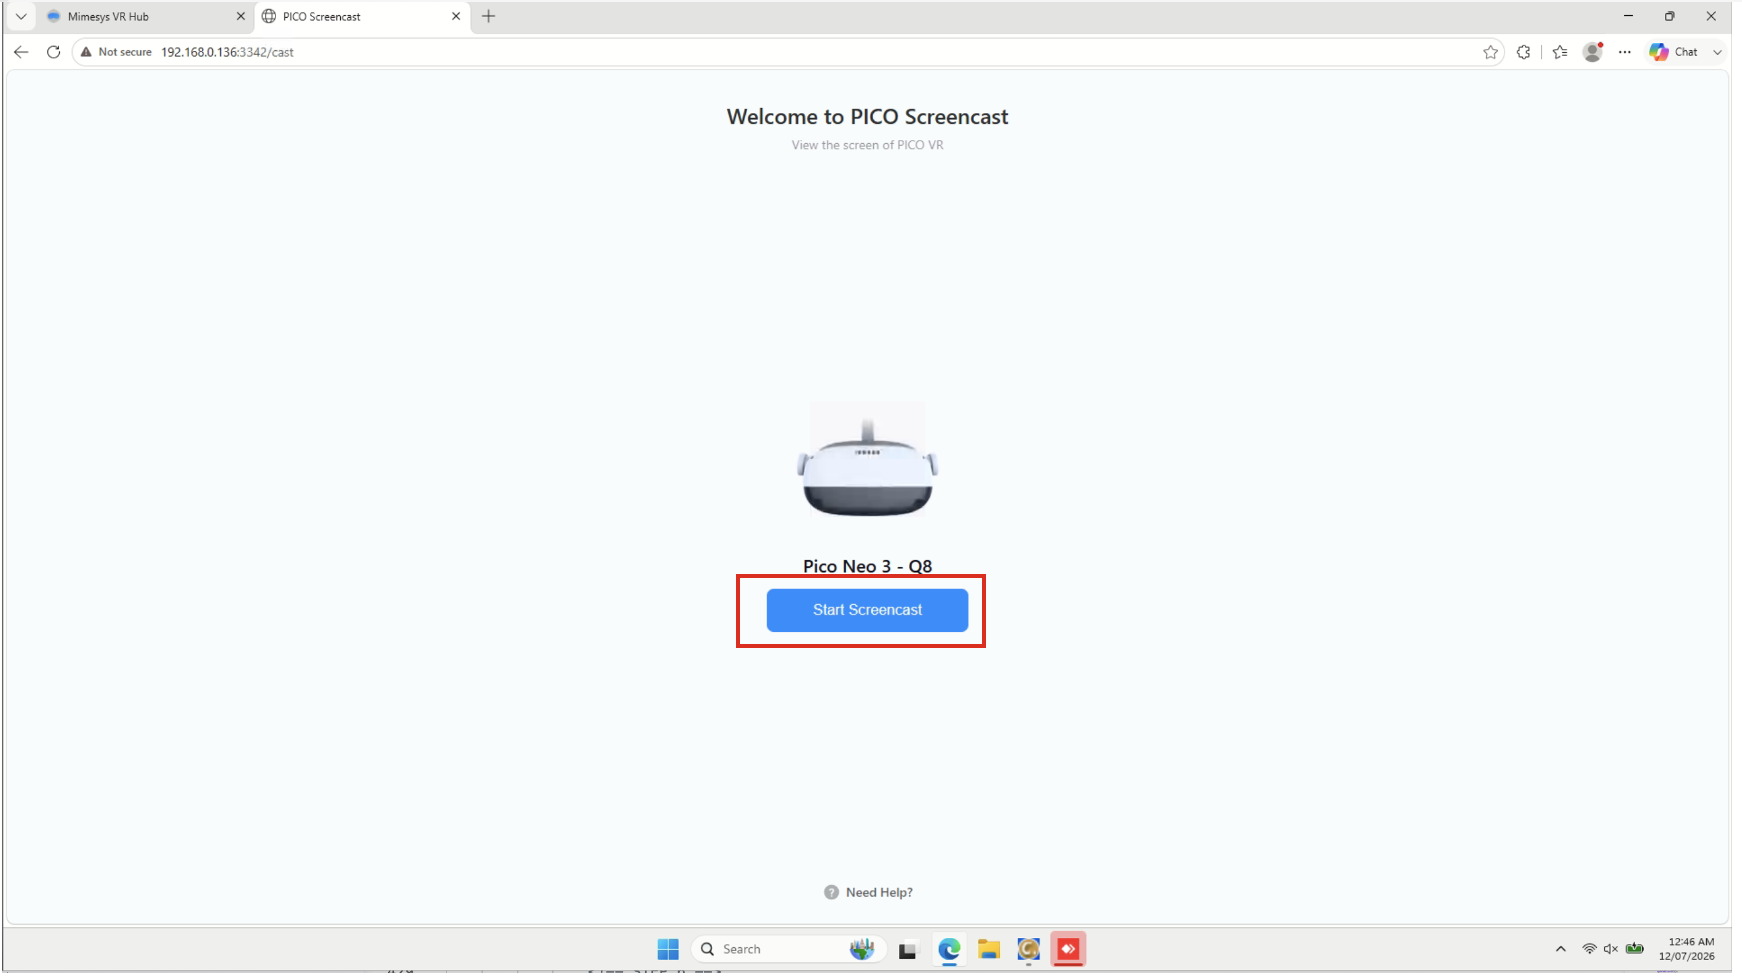
This way you are able to see what the patient sees while wearing the headset.
Hand the Headset to the Patient
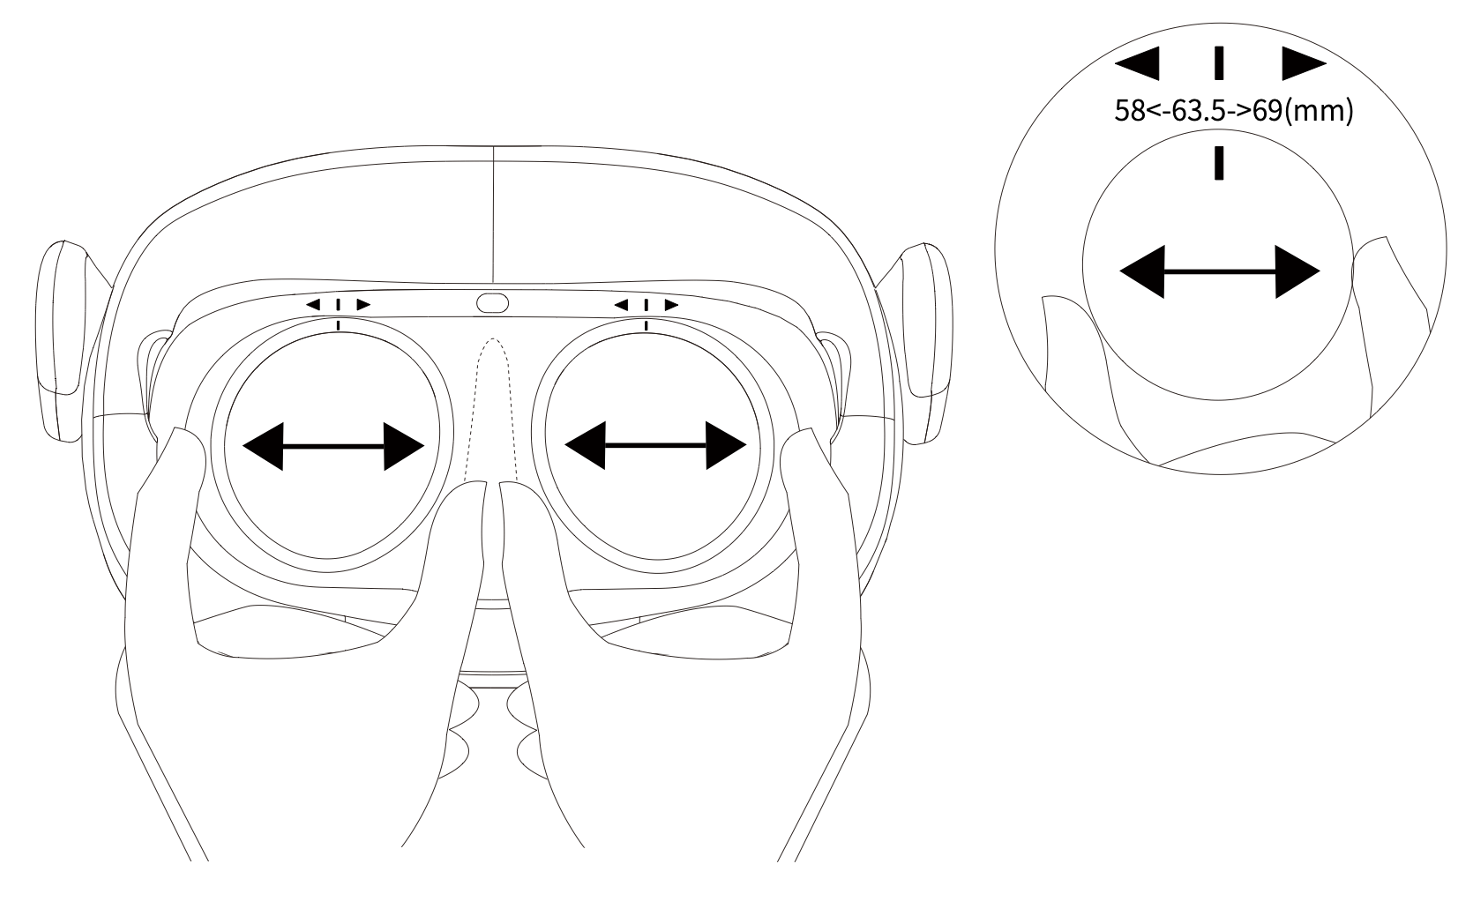
Before handing the headset to the patient, manually adjust the IPD of the Pico Neo 3’s lenses to approximate the patient's PD as closely as possible. The Pico Neo 3 has three IPD settings: 58mm, 63.5mm, and 69mm - which secure into position with an audible click.
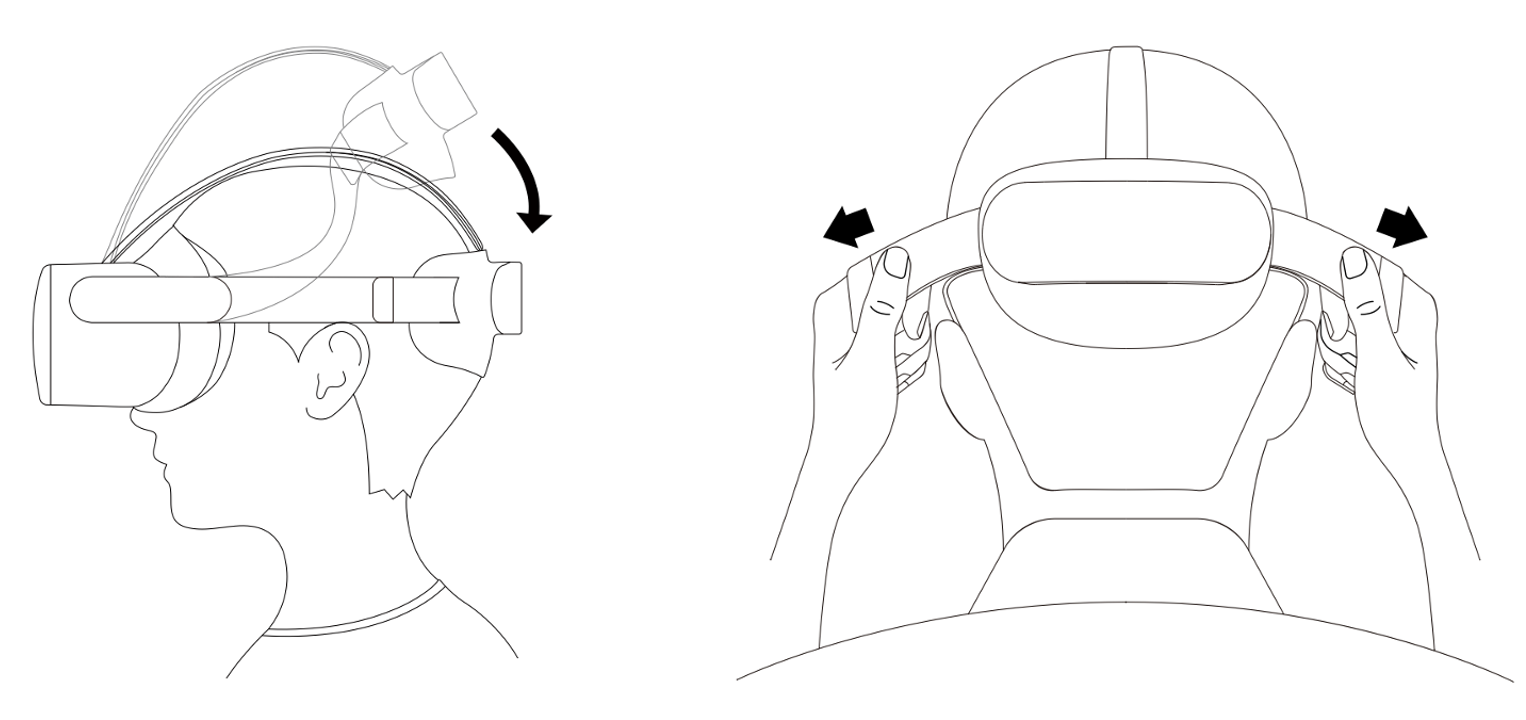
Have the patient sit down in a chair facing forward wearing their spectacles. Place the front of the Pico Neo 3 over the eyes of the patient and rotate the strap of the Pico Neo 3 down over the patient’s head. Adjust the side of the head strap to tighten it to the patient’s head without over tightening. The patient should be relaxed and comfortable.
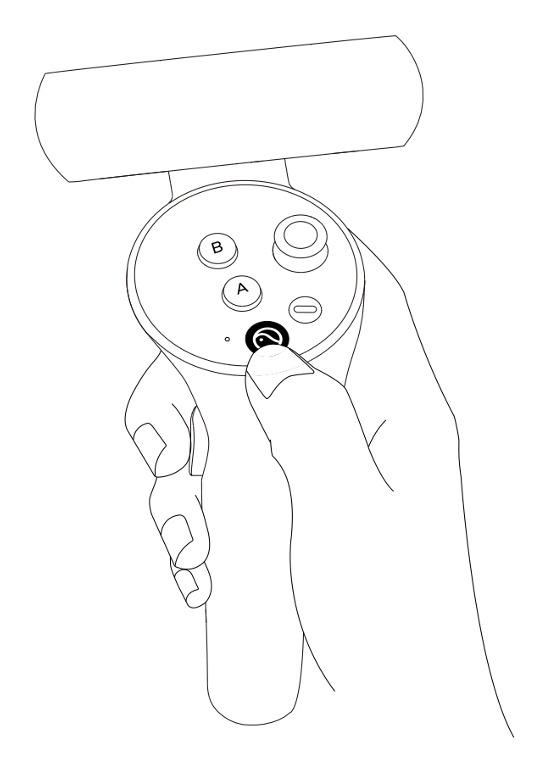
Once the headset is on the patient, press and hold the Pico button (Figure 8) on the right controller down to recenter the VR environment. Do not hand the Pico Neo 3’s Controller’s to the patient.
The Examination
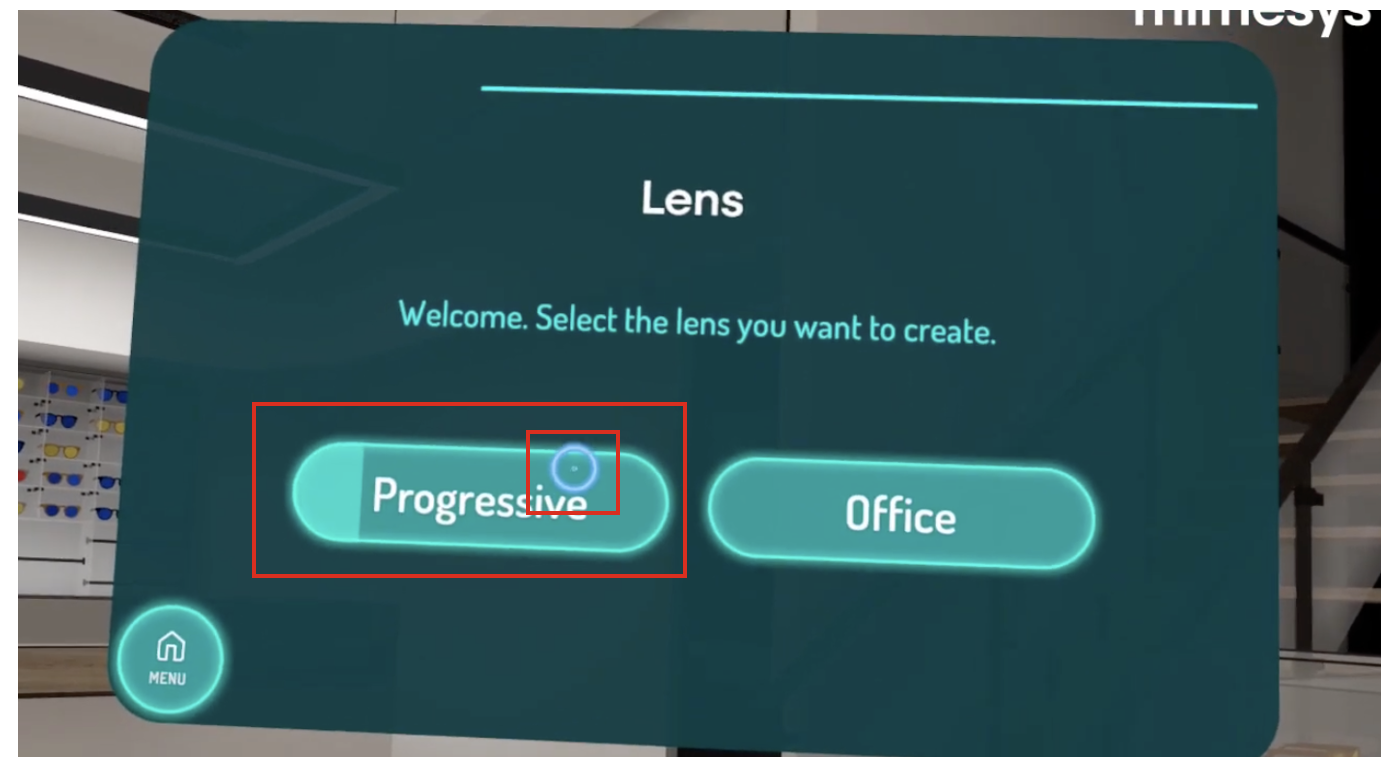
Explain to the patient that as they move their head from side to side, a dot will appear in the center. This dot acts as the cursor. Have the patient hover the cursor over the button called “Progressive” until it is filled in.
Explain to the patient that they will ascend to the rooftop in an elevator. Once they reach the rooftop, they will need to select a stimulus between a bird or a drone by hovering over it until the cursor fills.
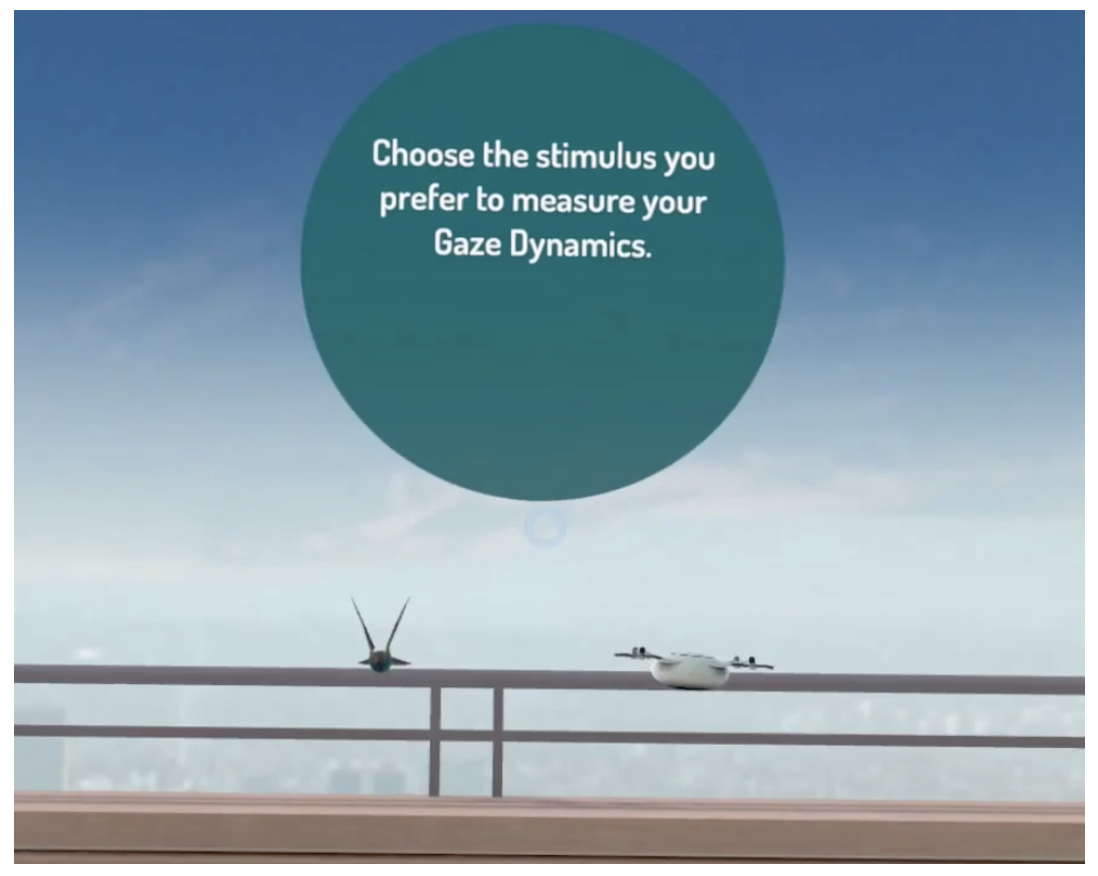
Instruct the patient to follow the stimulus as they would in the real world, by moving their eyes and head as they normally would.
Screening is Completed
Once the patient has completed the test, take note of the ID number on screen then instruct the patient to look at the back button until it is filled in, then remove the headset.
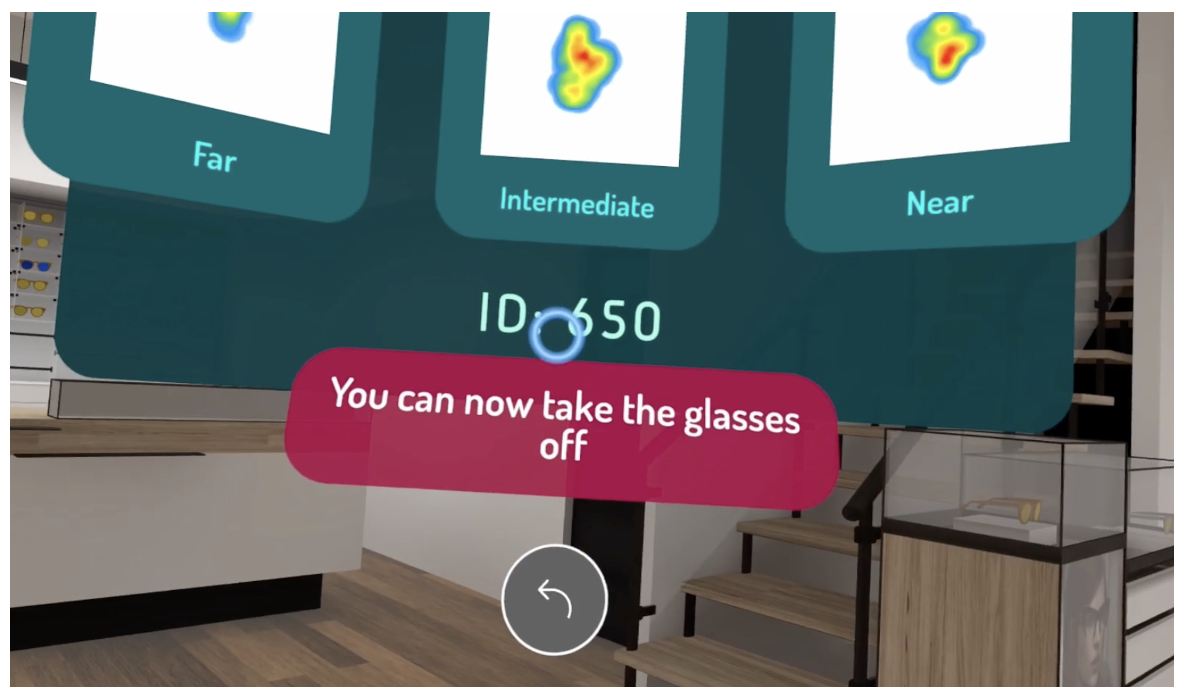
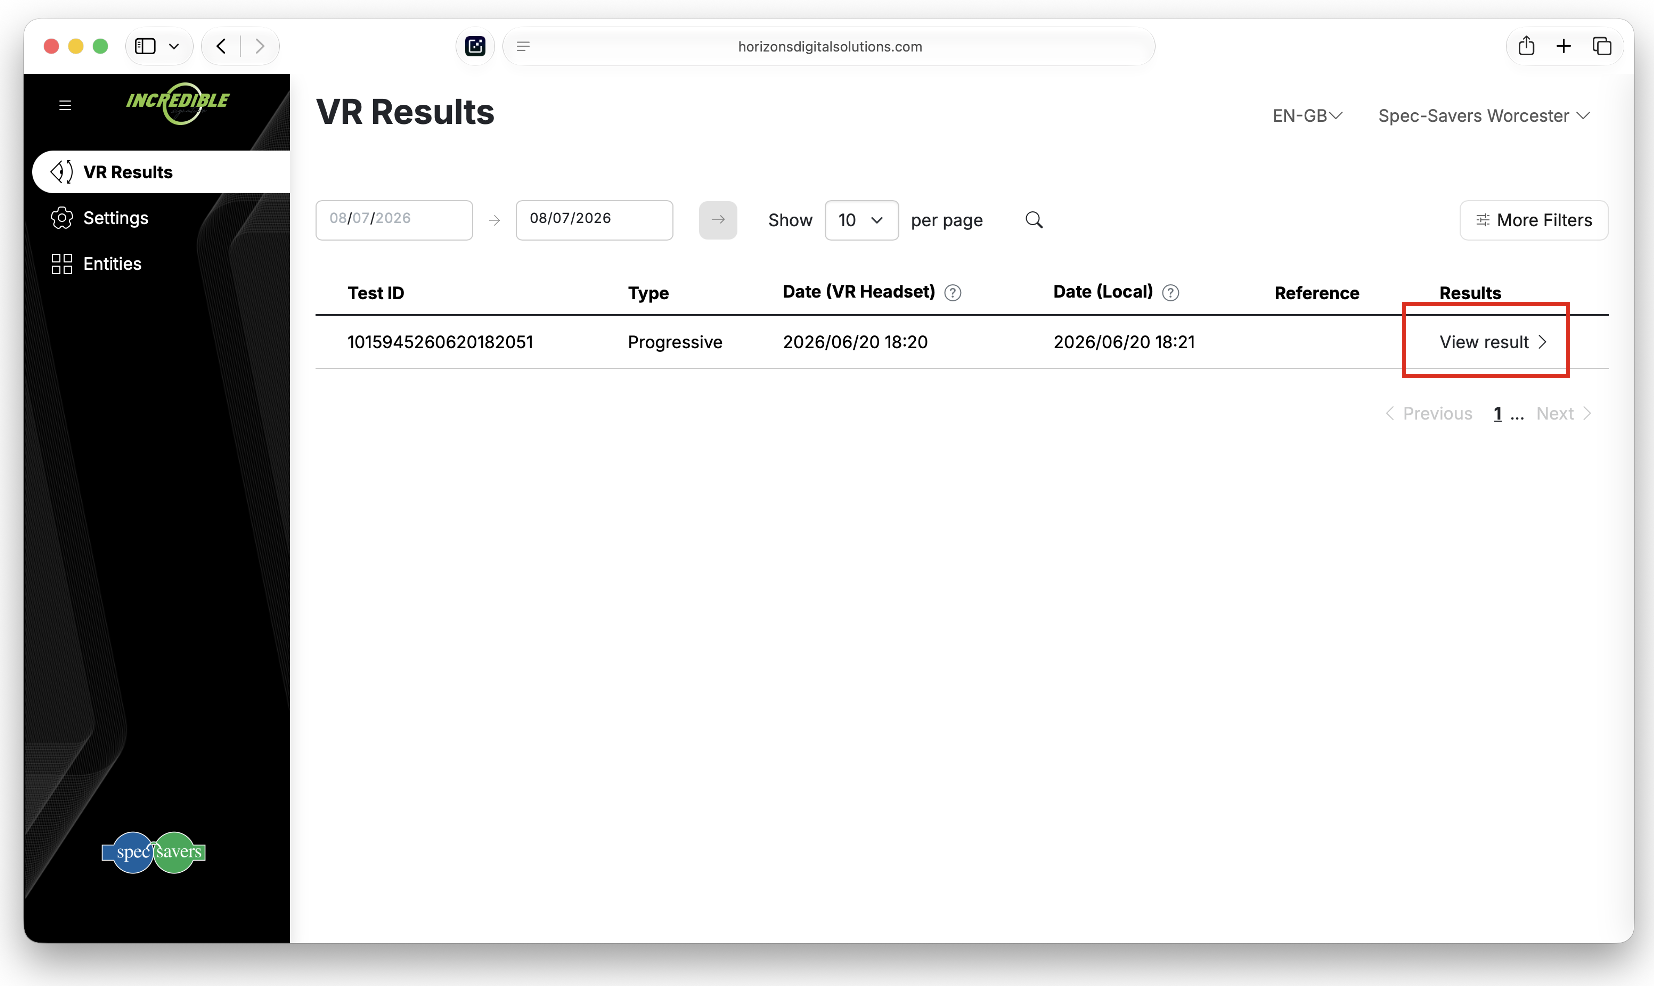
The test result will appear in the Backoffice website. The test result will be at the top of the page as the latest test taken. Click on the View Result button.
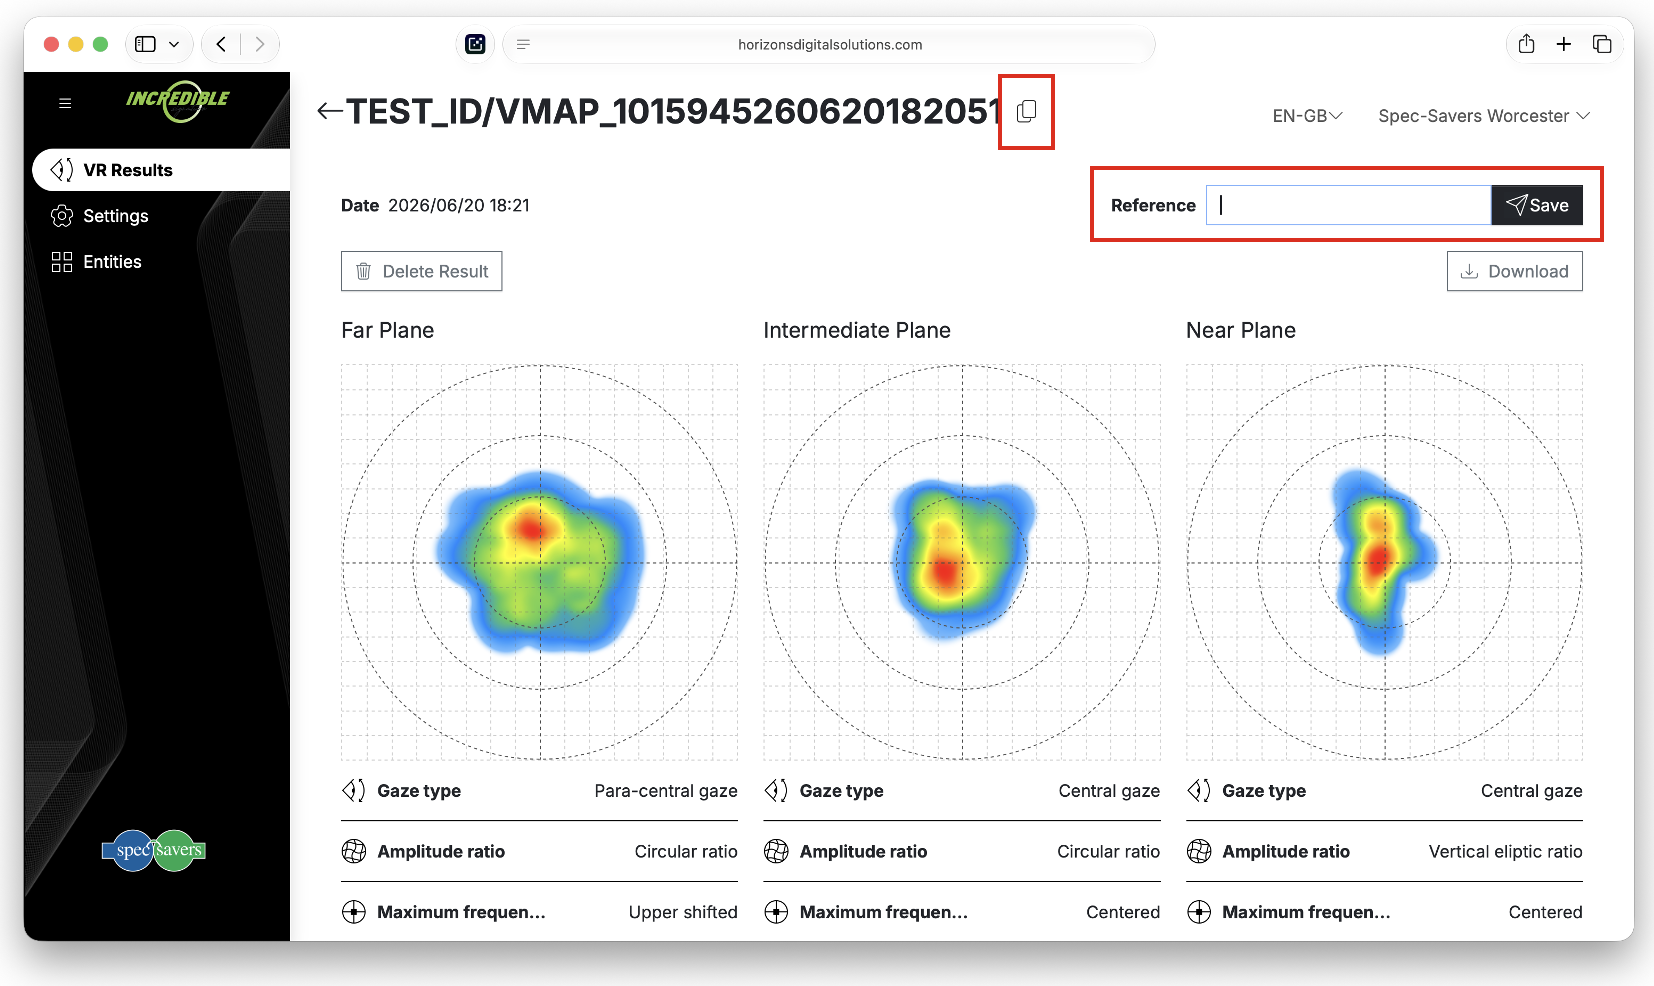
Once the page has loaded, you will see the results. Next to the date will be an option to enter the reference: enter the patient’s account number and name, then click the Save Button. Copy the patient’s Gaze ID but clicking the copy button at the top heading text.
Return to your patient’s quote in Calico Cloud. Select Lens Order’s from the bottom Tabs and paste the Gaze ID as copied from the Backoffice.
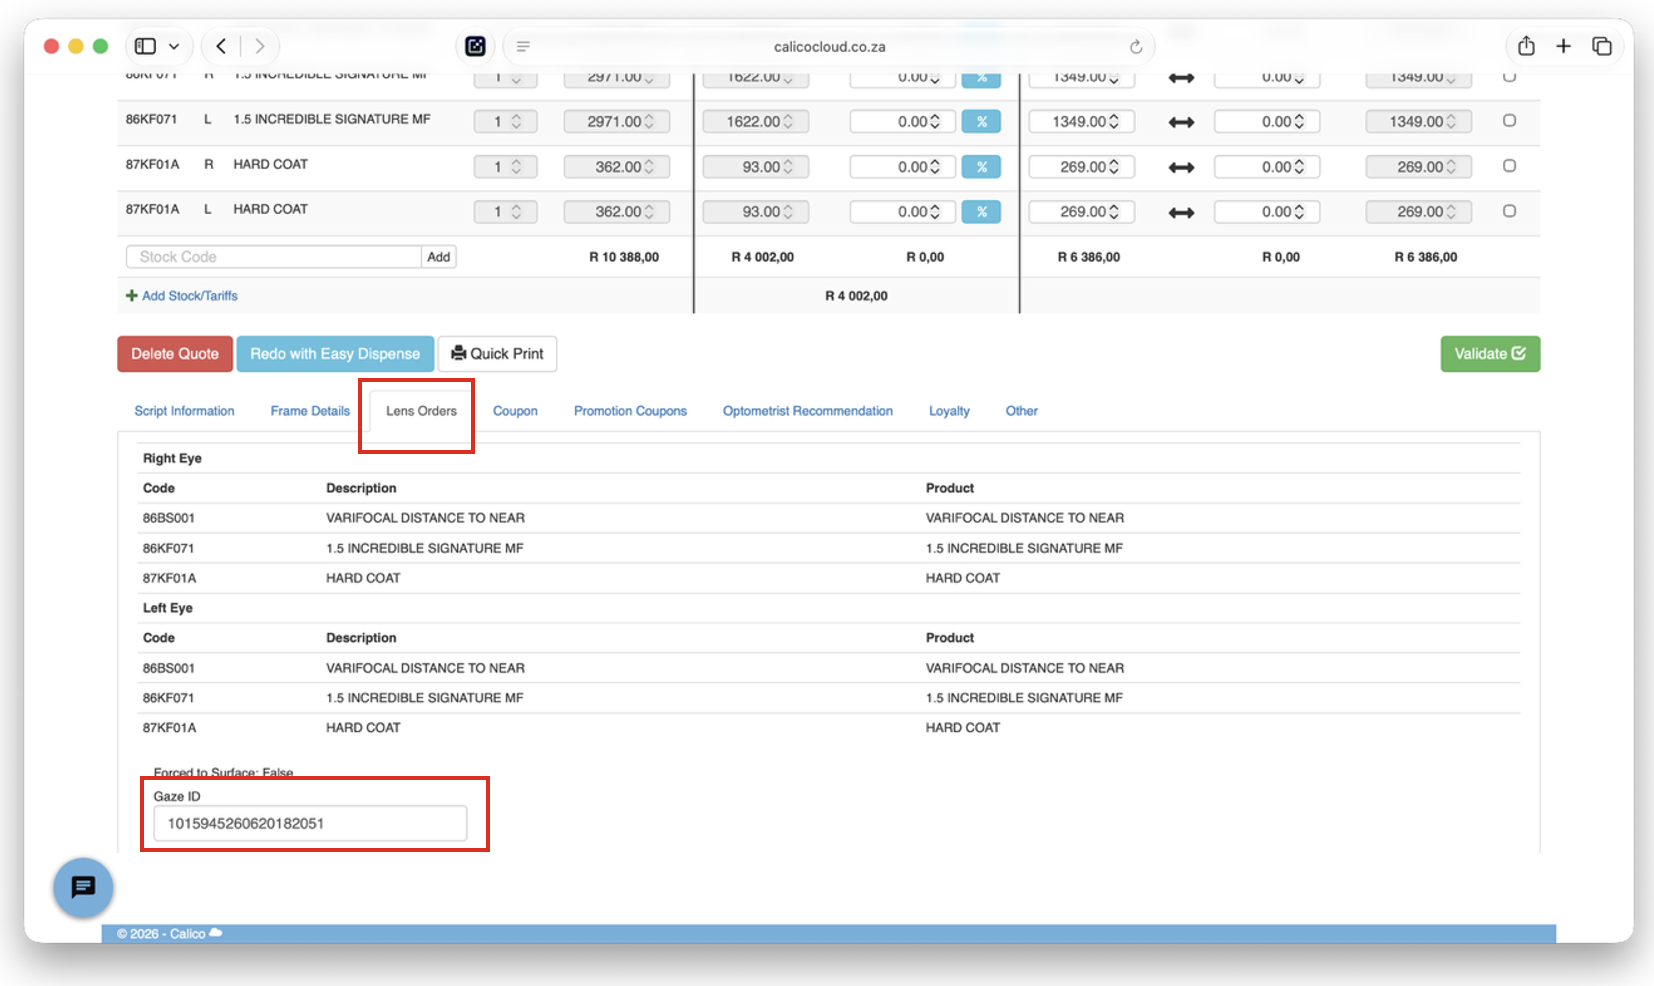
Calico Cloud will refresh and the Gaze ID error will disappear. Continue the Quoting process as normal.